Tuesday, February 2, 2021

Grateful Heart Cards

 Hi to everyone. It's been exciting to create for Bee Arty with the beautiful Grateful Heart Collection this month. I have created 2 cards. The first is quick and simple for those who need a card in 20 mins and the second has a pop up 'book fold' centerpiece to add photos and messages as a special feature. 


Card 1 - I have used a 5x7inch smooth white card base. To create this base cut a rectangle 7 inches high x 10 inches long. Score in half and fold to create your 5x7 base. 

Cut the This Is Us decorative panel from the 'Family' 12x12. Ink the edges in a contrasting colour, I have used an orange shade. Turn sideways and attach to the front of the card base as pictured below. 


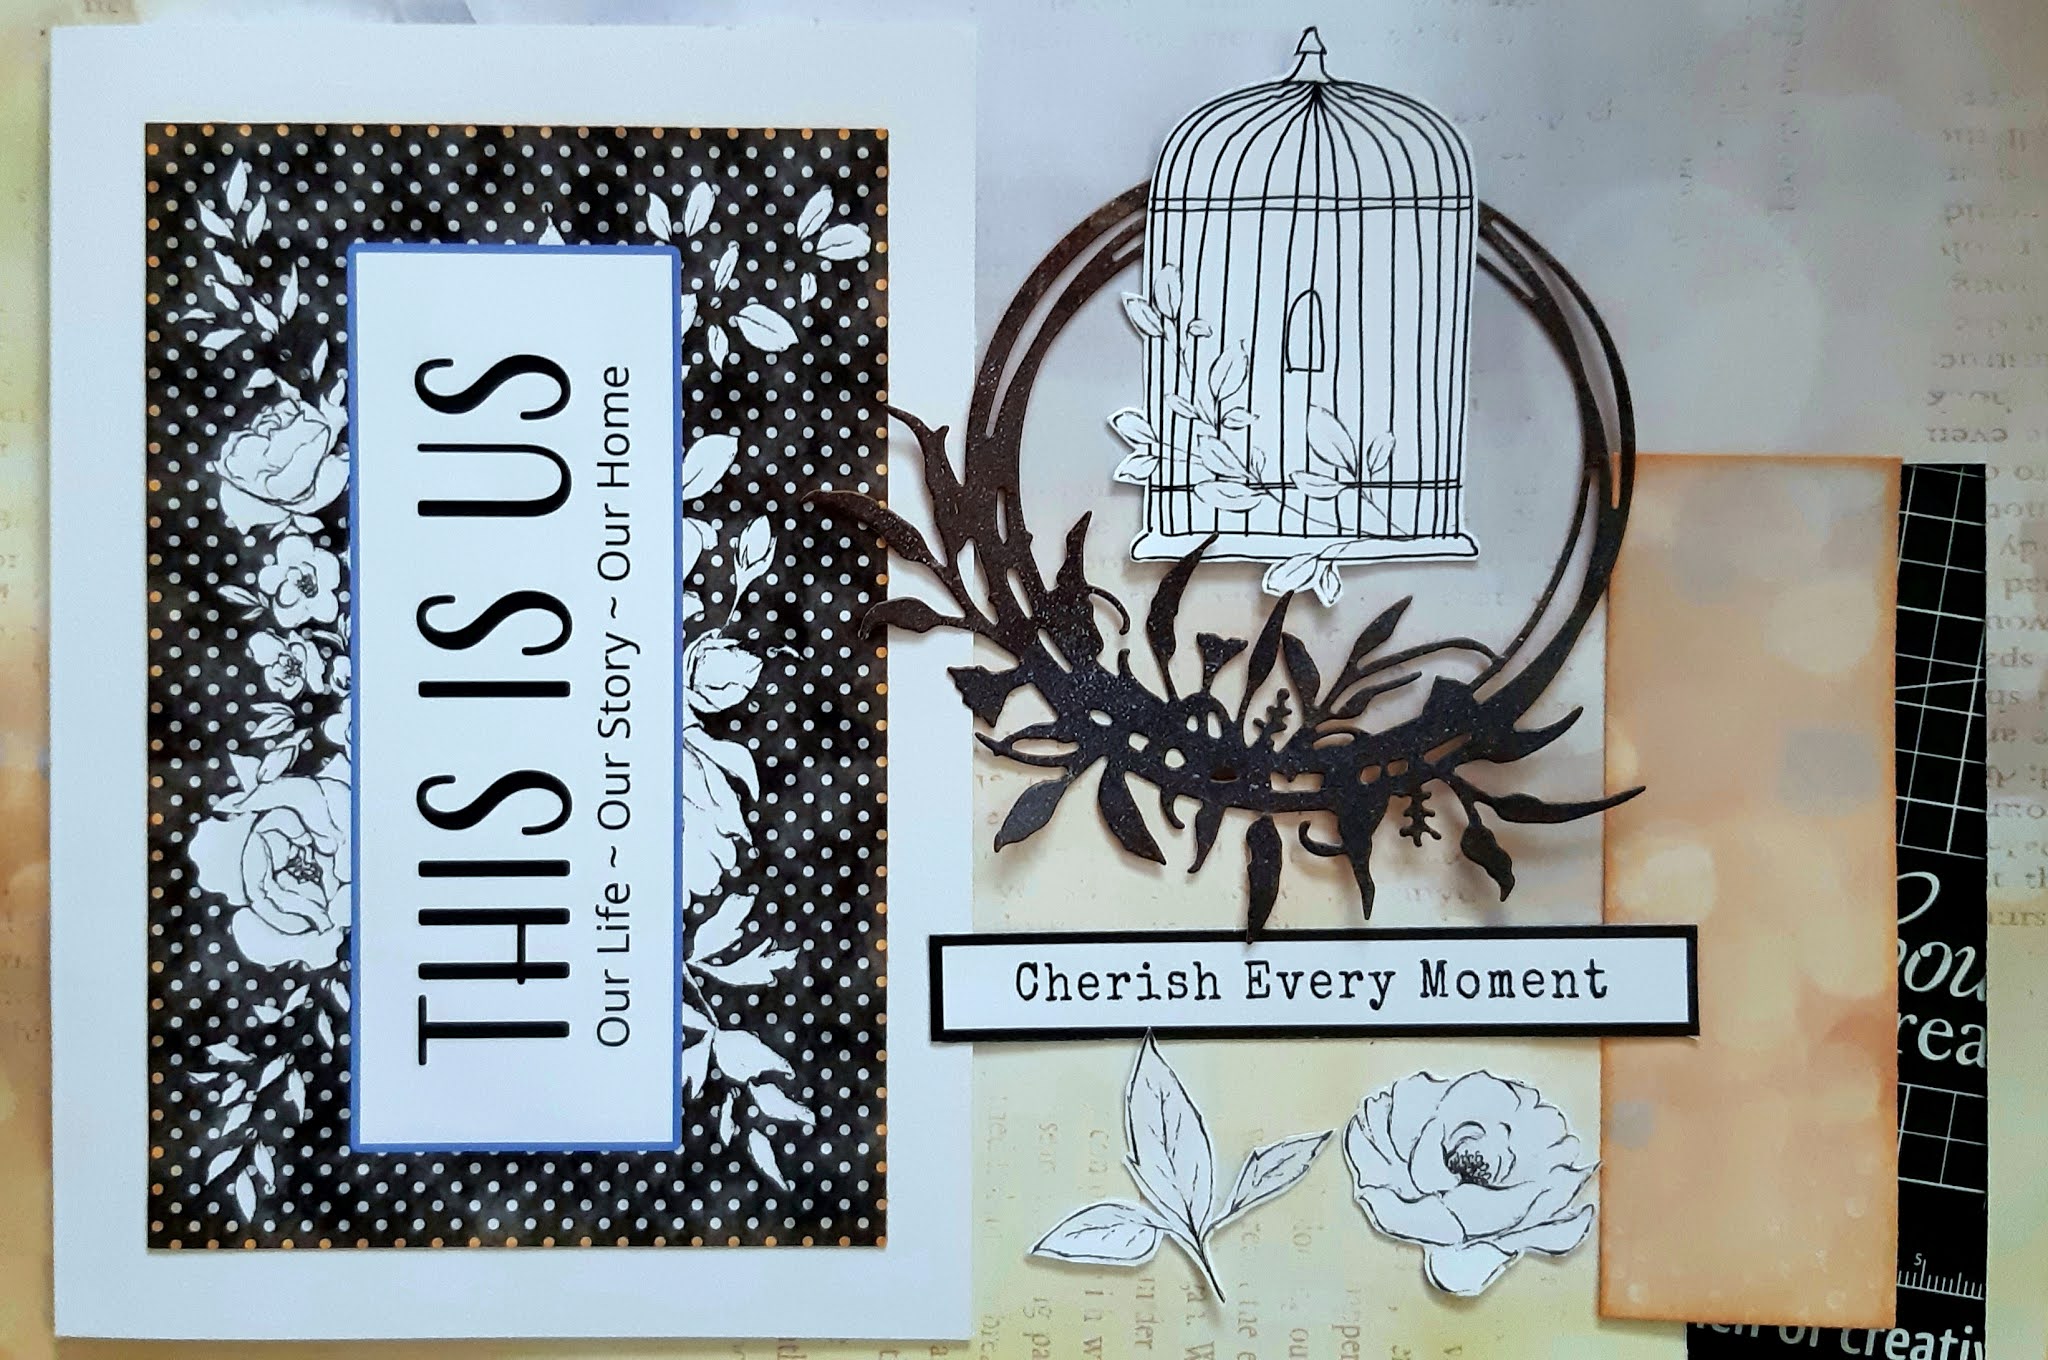
Cut the String Leaves Die from the 'Hope' 12x12, the Cherish Every Moment sentiment from the 'Blessed' 12x12 and the Birdcage and foliage from the 'Gathers' 12x12.


Cut a mini rectangle, 1.5 x 4.5 inches from the 'Love' 12x12. Ink, center and attach over the top of the  This Is Us sentiment.


Begin layering your String Leaves and Birdcage. Attach with 3d foam.

Continue by adding your Sentiment, again with foam, tucking the foliage around as pictured below.

Cut additional foliage pieces as you wish if you would like a fuller look.


 Card 2 - This second card is a 6x6 pop up using the 'Faith' 12x12 as the base and pop up.


Cut your 'Faith' 12x12 in half horizontally. 
The top half will become the pop up insert. Score, ink and fold the lower half to create the card base.


 Top half. Measure, mark and repeat for each corner - 1 inch down from the top and 1 inch up from bottom edges then 2 inches in from the left and right sides.
Score a line vertically from the top marks to the bottom marks on the each side. Duplicate another set of vertical score lines 3/4 of an inch inside those score lines. When folded, this will create the depth of the 'book' area.
Cut a slit between the 2 marks horizontally along the top, then again between the 2 bottom marks.
Fold the score lines of the book section. The outer score being a valley and the inner score a mountain. Score and fold the center of the book in a valley fold.
On the top and bottom thin sections, mark, score and make a valley fold 3&1/8th inches in from each side then mark, score and make a mountain fold at the centers.


For visual effect I have added a piece of black cardstock to the center of the card base as it makes the book fold centerpiece stand out more. As a bonus it also adds strength to the card.
Cut a piece 5&5/8th inches high and 7inches long. Score and attach flat to the center of the card base.


Attach 2 strips of lace vertically along the inner edges of the base card. 
Attach the book fold centerpiece 1/16th in from the left and right side edges. 
You only need glue/tape on the flat section of the centerpiece, so make sure the book is clear.


Now you can decorate in whichever way suits. I have cut various, birds, birdcages, foliage, border strips, banners and sentiments to layer on the front cover and centerpiece. Add some colour to the black and white images to blend your project or leave black and white to contrast.


I have attached a border strip vertically to the righthand hand edge and wrapped a thick sheer lace over the spine then attached a piece of lace with border strips, 1&5/8th inches up from the bottom edge. 


Once the base items are laid I have decorated the cover with the black frame, birdcage, foliage and sentiment layering it all with 3d foam and glue.
The book centerpiece has been decorated with sentiments and offcuts and on the left had side I have created a pop up flap for a private message, ticket or photo to go.


Happy Creating, Enjoy!! Katrina Thompson  x


Wednesday, December 4, 2019


Adventure with Sunburnt Country

A few simple ingredients from the Couture Creations Sunburnt Country collection were needed to create this bright and simple greeting card.


Materials used : 
1 sheet and 1 patterned barcode strip from the 6.5 x 6.5 Paper Pad CO727278
Acacia Branch Mini Die, CO727227
Adventure Mini Die, CO727231
Silver Princess Mini Stamp, CO727205
White 5 x 7 card base, CO725815
Raincoat Card stock, ULT200050
Pearl White Pigment Ink, CDEIPL008


Cut a strip from the Raincoat card stock, 3.5 cm x 17.3 cm and cut 3 Acacia branches in a row.

Attach the strip vertically along the left side of the card base.

Trim the decorative strip from another of the 6.5 papers, then trim the product code off. The strip is not long enough, so we will cut it in half attaching it as pictured. The open area will be covered by our panels.


Cut out the 2 yellow flowering corrugated panels and the Blue cloudy corrugated panel. Stamp the Silver Princess Mini Stamp onto the cloudy panel as pictured.

Layer the 3 panels using the picture as a guide. Mount the stamped panel and bottom panel with 3D foam tape.


Cut the Adventure mini die from the wood grain panel and mount onto a strip of white card. Layer and attach the piece between the 2 main panels as pictured.

Cascade 2 of the 3 Acacia branches cut from your decorative border over the bottom panel to finish.


You can also brush a little of the Pearl White Card Deco Pigment Ink over the branches and border to give a nice subtle shimmery effect.

Enjoy! Katrina Thompson

Thursday, November 28, 2019

Bohemian Bouquet Star Book

Hi everyone. I have a Star Book for you all today using the Bohemian Bouquet collection.
Technically, these are easy books to put together, then it is totally up to you how you may wish to embellish it. You could fill it with quotes, pop photos in or make it a journal, or mix it up as you can see below.
I have the basic measurements of my book and then a pictorial of design ideas. You can always adapt the sizing to whatever you have planned to put inside it. Enjoy!! K


I have chosen a 3 layer star book with 6 sections.
My base layer is the coloured card. I have chosen to alternate the colours using 2 coordinating card colours, Blue Moon and Carnelian, to match the Bohemian papers.
Cut 3 sections in each colour, (6 in total), 15cm high x 29cm long. Score and fold in half.
Cut 6 pieces of white card, 15cm high x 25cm long. Score and fold in half and ink the edges in a coordinating colour.


Cut 6 panels from the 12x12patterned papers, 15cm high x 21cm long. Score and fold in half and edge in a coordinating colour.

I have created an inverted panel on 2 of my panels as a feature. Measure 5cm down from the top and 5cm up from the bottom, (1/3rds) and cut 2 splits, 3cm deep.

Your panel is a valley fold so push your cuts outward to make a mountain fold, ready to embellish.

Your pieces are all 15cm high but are graded in 4cm increments, 29cm, 25cm and 21cm.
Create your 6 sets, alternating the colours.
Attach each individual set by gluing the side edges.
Then attach each of the 6 sets together to make the star. I don't glue the spine edge, just the top bottom and outer edges. 

Cut a selection of patterns from the 6x6 paper pad to use for embellishing....

...and use your offcuts of card and paper and add some coordinating lace trims also.


Room for photos, quotes and journaling.


Before adding the front and back covers, I have added a panel in a contrasting colour. This also adds a bit more strength to the cover. This is also the time to attach your trim to tie the book together.

I have a selection of the patterned papers, decoupage die cuts and some foliage for the covers/


Products used to complete this project.
Bohemian Bouquet Collection:
Couture Creations:
  
Until next time, Happy Creating!! K x


Monday, February 12, 2018

Ooh La La card duo

Hi everyone! Today I am sharing a card set created with the Ooh La La collection. I have showcased the fabulous Framed Art Deco Butterfly Die Set that is great to mix and coordinate with the variety of patterned papers. With the addition of the Ephemera, Lace and Pearls, we're ready for some gift giving. K x

 
Firstly, to cut the die pieces!
Cut 2 squares from the paper pictured, 11.3cm. Cut 2 sets of the Framed Butterfly Die Set.
Using the centre piece of one set, cut the Butterfly. 
Put aside the centre piece from the 2nd set for the next card.
We will use 1 outer frame and the butterfly for this card. The 2nd outer frame is spare.
Note: If you centre the butterfly when you cut it you can save that piece for another project too!
 
Cut a square 12.5cm using the patterned paper pictured below. Cut the frame, off centre as pictured.
The creamy centre piece is going to be inserted into the frame from the set we cut above and the centre piece from above, that we put aside, is going to be inserted into the frame below.
Mix and match!
 
 Cut a piece of Cinnamon card 14.2cm wide x 28.5 long. Ink the edges in a coordinating colour.
Cut a piece of Kahlua card 12cm square.
Cut out the Happy Birthday greeting from the ephemera and cut 2 layers from the papers pictured in 2mm increments. Ink the edges.
Die cut the 2 mini flourishes in the die set from the Paper Bag cardstock and ink to blend also.
 
 If you like a sentiment but it may not fit your design, cut and layer the greeting to create your own.
 
Score and fold the Cinnamon card to create a square card base.
Layer the 3 greeting pieces with 3d foam.
Attach the combined die cuts to the Kahlua square and layer the lace around the edges, secured well from behind.
 
Attach the layered lace panel to the base card, centre the butterfly and attach your greeting and flourishes as pictured. 
Embellish with pearls to finish.
 
Cut a piece of Cinnamon card 14.2cm wide x 28.5 long. Ink the edges in a coordinating colour.
Cut a piece of Paper Bag card 13cm square.
Cut a butterfly from the patterned papers as pictured.
Select a greeting from the ephemera set.
Mix and combine the die cuts from the first 2 steps. 
 
Score and fold the Cinnamon card to create a square card base.
Attach the combined die cuts to the square and attach the layered panel to the base.
 
Attach the ephemera greeting to the decorative panel with 3d as pictured and offset the butterfly. 
Embellish with pearls to finish.
  
Products used to create this project:
 
Ooh La La
Couture Creations
 
Until next time Happy Creating!! K x